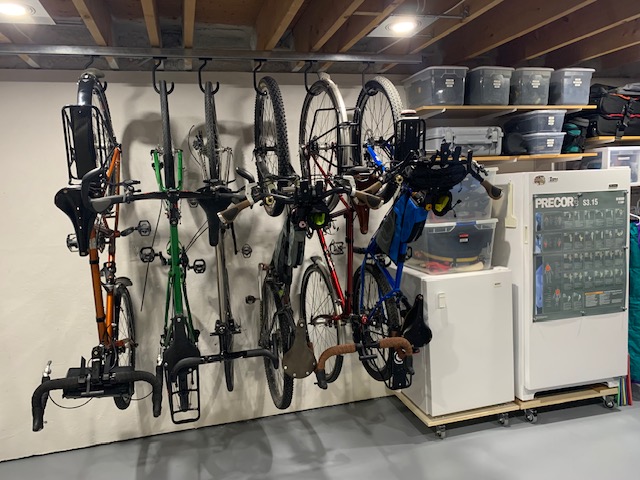
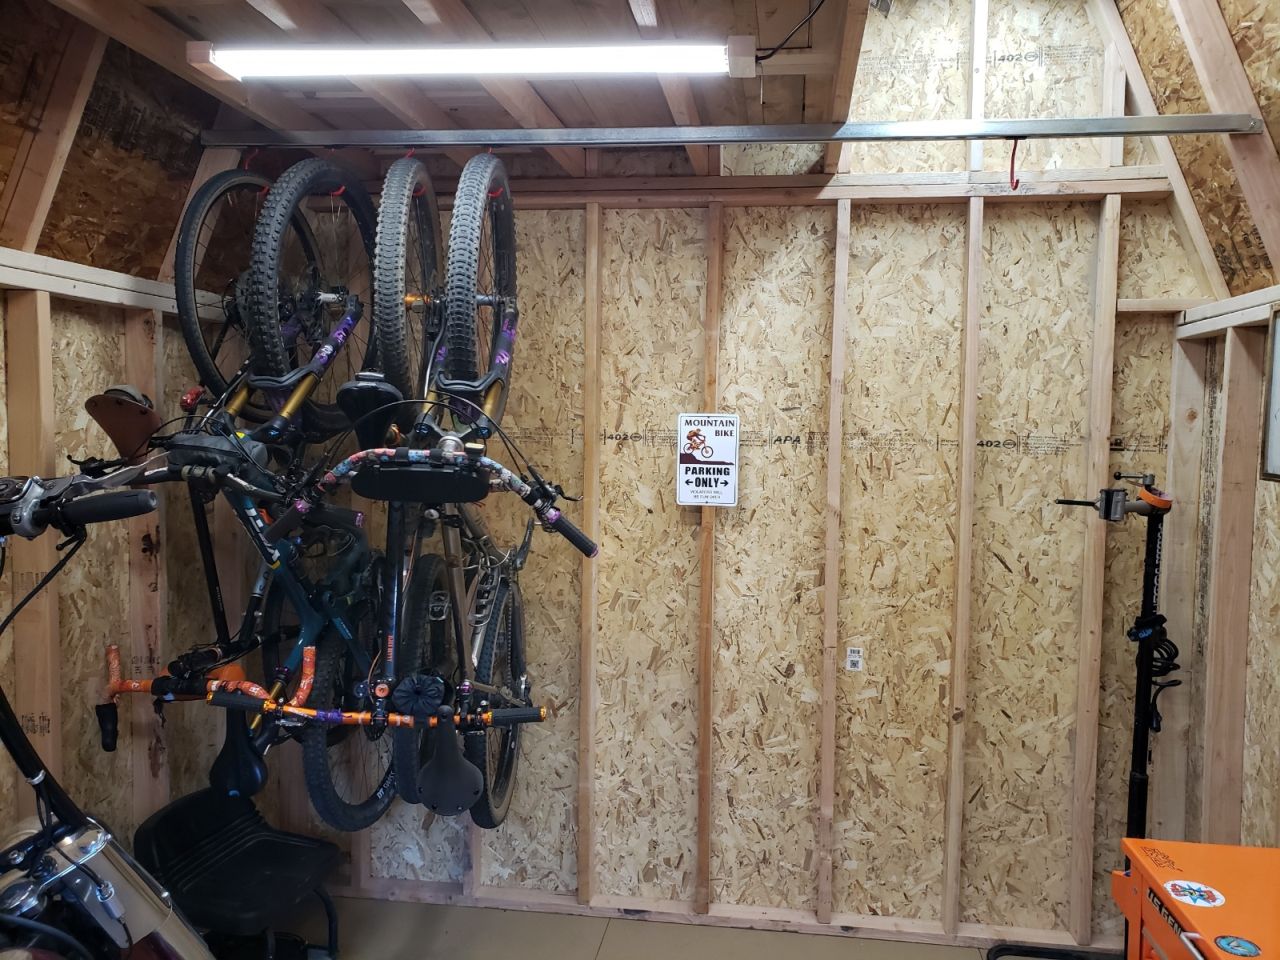
Al was kind enough to share his experience of installing a sliding bike rack in his basement. The story telling is top notch and the details superb and thus deserves a page in GearBlocks History!
Al’ story
“As part of a recent home remodel/renovation project, I looked into the Gear-Blocks product as a potential solution to a bike storage challenge that we were facing as a family and hoped it would be an improvement over the set-up that was already in use. The bikes in question were to be stored in the basement area of our home as opposed to a garage or storage shed and up until now, were just being hung from the floor joists with traditional bike hooks, the kind available at most hardware stores.
If it matters, I would describe myself as a riding “enthusiast” with a focus on riding for fitness and recreation more so than competition so over the years, our collection of bikes in the family inventory is diverse and include dedicated touring bikes of different wheel sizes, hybrids, bike-packing rigs as well traditional, 29 inch wheel mountain bikes. We even have a couple of winter fat-bikes and a tandem in the mix as well so one can see we have a pretty diverse collection and the challenge has always been how to store them safely and efficiently especially given they are all so different.
Over the years, we have tried an assortment of mainstream storage systems to keep everything in check as our bike collection grew, including wall-mount systems and simple bike hooks in order to bring some kind of order to the chaos of having to keep the bikes orderly and easily accessible. Experience has shown me that there is no one system that seems to do the job perfectly so as one of those annoying people who is always looking for a “better way” to do things, I went searching for a system that would be better than what we have now, and would be a nice compliment to the recently renovated area of our basement as previously mentioned.
In the name of full transparency, I am not a qualified tradesperson, nor do I have any formal training in carpentry or related skills but I would call myself an enthusiastic home-handy person with an open mind to giving any project within my skillset a try and so I was open to giving the Gear Blocks system a go as a potential solution to our needs. Should also mention that I have minimal tools to carry out said projects, but I can read a tape measure, hammer a nail without hitting my thumb, drill a hole and use good judgement when I know I’m in over my head with something. So with that, I set forth investigating the merits of a Gear-Blocks sliding rail system.
After a fair bit of internet sleuthing on bike storage in general (thanks Google!), I was curious about the sliding rail storage systems as promoted by Gear-Blocks and settled on that as a potential solution to my bike storage woes. I read enthusiastically through all of the top-notch info and visuals presented on the Gear-Blocks website and was satisfied this wasn’t just another fly-by-night internet operation but in fact, a serious business dedicated to helping customers find solutions to their needs. My curiosity was both confirmed and solidified following a phone conversation with Brian regarding my needs and situation, so let’s just say he was both forthcoming and genuine when it came to answering any questions I may have had and that was most impressive. Should also mention that I actually talked to a real person (Brian himself) and not a message machine offering me a menu of response options that I was required to pick from and that was very refreshing in the age of declining customer service. I’m an old enough dude to value the importance of a conversation with a real person so if you are of like mind, Brian is your go-to person for that and I don’t think you’ll be disappointed.
A challenge I was faced with was with regards to shipping the products I chose as I am one off those cost-conscious, sketchy foreigners living outside of the US who has to contend with exorbitant shipping and duty fees soften associated with online ordering and sometimes that can really add to the cost of things and that hurts. Like most folks, I believe in paying fairly for products but not over-paying of course, but along with that, I am happy to support an enthusiastic entrepreneur with my purchase. Fortunately for me, I live relatively close to the US border where it meets my home province so having products shipped to a parcel service just across the line is very economical and so that what I did with regards to shipping.
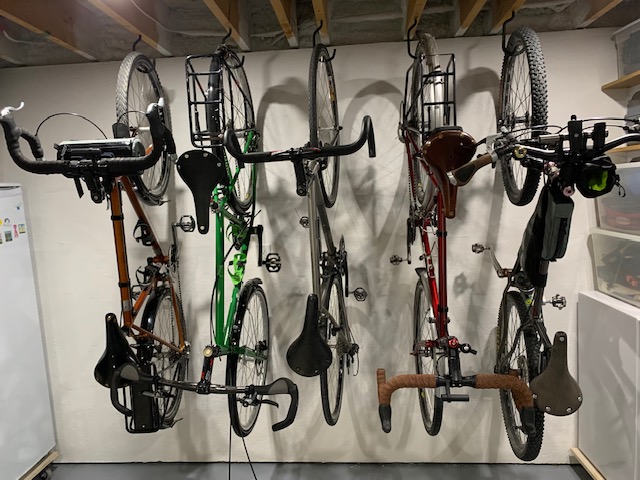
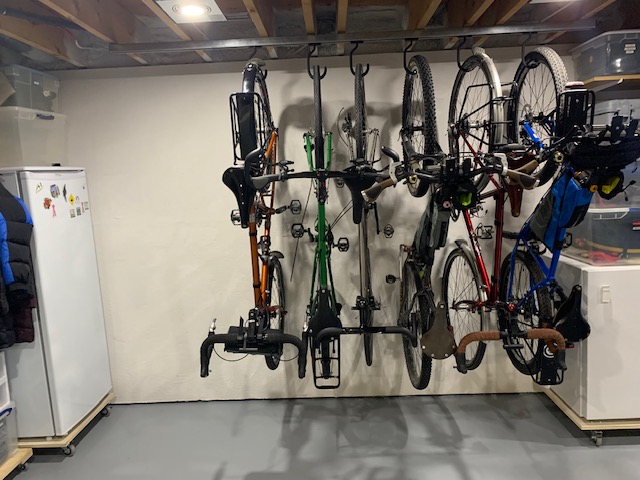
Our tandem bike as well as the fat bikes are stored in another area of the basement so they weren’t going to be part of the bunch to be stored on the sliding rail system so I chose to go with the six-pack of large-sized Gear-Blocks hooks which would cover the needs of the half dozen bikes that needed a new home. As well, I ordered a pair of the end caps to attach to the required Uni-strut rail. Shipping was free within the US so it was sent to the parcel pick-up place I mentioned so droving to the border to pick my parcel up was the plan and it was a very smooth transaction every step of the way. The parcel arrived within five business days as stated on the order site so thanks Gear-Blocks for making things so easy!
Once I received the required hooks and such, the next challenge was to find the Uni-strut rail locally and set about trying to install it in my basement without killing my self in the process. I had never heard of the Uni-strut product before and other than seeing it on the website, didn’t know much about it but that’s part of the learning experience isn’t it? I did learn that Uni-strut is also known as galvanized steel electrical conduit and may go by other trade names including Super-strut.
As suggested on the Gear-Blocks website, the Uni-strut rail product can be purchased at any number of home product stores such as Home Depot or Menards but if its an option, my advice would be to check out local electrical supply dealers as product sourced there will be much cheaper than what building supply stores offer. In my case, purchasing from a local electrical supplier was half the price of that from Home Depot was offering, so that was the route I took.
Keep in mind too that the product usually comes in ten foot lengths so consider how you plan to get a length of product that size from supplier to home especially if you have a smaller vehicle. In our case, we have a car with a roof rack so I was able transport it home safely with it strapped securely on top and there were no problems doing so. Another challenge was how to get a ten foot length of steel rail into the house, down the stairs and around a tight corner in the basement without taking out something or gouging a nice hole in the wall so I had to do some thinnin’ on that.
Given that I was only planning to hang six bikes, wasn’t sure that I needed the full ten foot section of Unistrut, so made the decision to cut it to length before bringing it into the house. After conferring with Brian by phone once again, was assured that a length of about seven or eight feet of Uni-strut would be sufficient for six bikes and in the end, it was. I understand the Uni-strut can be cut with a hacksaw which would have worked with a lot of effort on my part, but I chose to go another route and call up a friend who has a metal cutting chop saw, so I headed over there and had him cut it to length. Also, I was concerned about being able to cut the section square enough in order to have the end cap fit properly, so wasn’t confident that cutting a section of steel freehand without a cutting guide would give a good result so I deferred to using the proper tools and having an experienced person (not me) using that metal cutting power tool.
My next challenge was to obtain the proper mounting hardware as recommended by Gear-Blocks so I set forth to do that which turned out to be a very inefficient process given I had to drive to more than one Home Depot to find what I needed. In the true spirit of Murphy’s Law, the screws and washers that I needed were only in stock at the Home Depot located the furthest distance from my home (waaaaah, waaaah!). With proper screws, washers and Torx drill bit in hand (it’s a T-30 bit), I was ready for install. In retrospect, I think a person would be wise to just order the hardware package from Gear-Blocks and save the cost of all the gas you’ll burn driving around just to save the ten dollars or so that hardware option costs – just my opinion but keep in mind I’m a novice.
So once I had all of the materials in hand, here’s what I did to get the system installed and working as it should:
A) I collected the tools I felt I would need including a drill, drill bits, a tape measure, step stool/small ladder and a Sharpie to mark the spots I planned to drill pilot holes for in the wooden floor joists.
B) With my wonderful wife to help, we did a test fit by lifting the Unistrut section up to the floor joists to be sure the mounting holes on the floor joists I planned to drill would align with the slots found on the Unistrut (and they did – woo hoo!). Keep in mind that I had not done any drilling just yet. Neither my wife or I are of basketball player height so the step-stools we used came in handy.
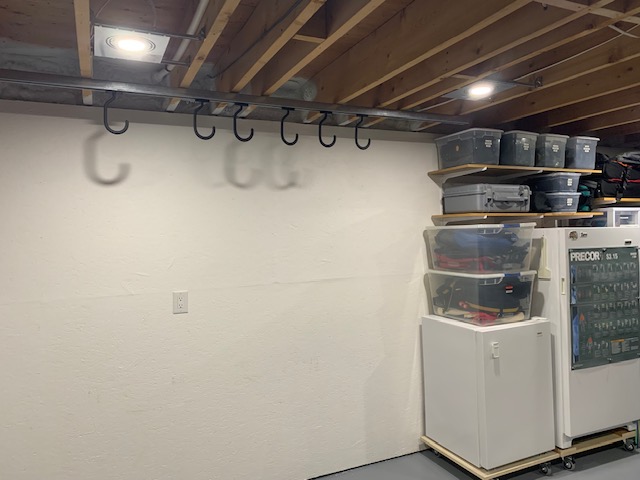
C) How far you mount the Unistrut rail away from the wall is definitely a personal choice but in my opinion, it should be far enough away to allow the bike to hang from its wheel vertically without rubbing against the wall. If the tire is too close to the wall, it will rub as you slide the bike from side to side along the Gear-Blocks hooks and that’s probably something you don’t want. So in my situation, the largest wheel of the bicycle to be hung belongs to my 29’r mountain bike and it runs with 2.3 inch tires so that creates a wheel with a diameter of about 32 inches from edge of outer tread to edge of outer tread if you were to measure a straight line through the hub. The bike will hang freely from a hook that is half of that distance away from the wall so in this case, approximately sixteen inches. I allowed for an inch or two extra to prevent rubbing, so my plan was to drill mounting holes about seventeen and a half inches away from the wall on the joists and when I held the Uni-strut up to the floor joists, that’s where I would screw in the mounting hardware.
D) As a precaution, I drilled a fairly deep pilot hole into each joist before mounting as I wasn’t confident that my drill would have enough torque to drive a three and a half inch screw into the joist, and it wasn’t. I certainly don’t have Popeye-sized forearms but was able to use a hand screwdriver to get the hardware secure enough after the drill tapped-out torque-wise, that it wasn’t going to fall down. As a tip, before you screw the Unistrut section down tightly, partially install each of the mounting screws only tight enough that it won’t fall down as this will allow for some side to side movement as that way you can be sure the slots in the rail section will be in alignment with the mounting points you have gone with. Once satisfied all is well, tighten them down to your level of satisfaction. Now you are ready to install the hooks.
E) There is no rule that says all of the hooks have to be oriented in the same way once they are on the rails but being the ever anal-retentive that I am, I had them all face the same way and in doing so, didn’t lose any sleep over it that night so all is well in my universe and my obsessive-compulsiveness has been alleviated. You will find that the bearings attached to the hooks are quite slippery so it doesn’t take a lot of effort to move a bike from side to side so if doing a test slide of a bike, be sure to install the end cap first otherwise it could slide right off and then it would be hilarious!
Before installing the end caps, might be worth it to unscrew the provided screws and add a dab of grease to the threads as they are quite tight – not sure if over tightening those screws could cause the CNC’d plastic to crack but why take the chance? The mounting screws on the end caps require a 10mm socket or for the bike mechanic types reading this, if you have a standard Y-wrench in your tool box, that will do the job quite nicely. If neither of those tools are at your disposal, you might have to find something else to screw them in and for my American friends, unfortunately I don’t know what 10 millimeters is in “Merican inches.
Thanks for reading, hope my story is of help to anybody out there willing to have an open mind and give a project like this a try just as I did. I will also conclude by stating that based on what I’ve seen so far, the Gear-Blocks system is worthy of your consideration as it is very unique, excellent value and is well-supported on the customer service side of things. Cost-wise, even with the inefficiencies I described when carrying out this project which for the record were my fault and not that of the product, I was able to efficiently store six bikes in a very secure way for less than $40 USD per bike.”
Regards,
Al, That Canadian Guy
